Earlier this year I wrote a blog post about
Love Grows Love, a children's book by Lauren Fischer. Love Grows Love
teaches children about emotions and empathy. Making seed paper is a fun
craft that can be used as a follow-up enrichment activity to reading Love Grows Love, as a standalone craft for Earth Day, or as a part of your science lessons
about seeds and plants.
Be warned... making seed paper is is a deceptively simple activity. It's
fun, has very few steps to follow, and won't cost much when you buy the
supplies at the store. Sounds great, yes? Making seed paper in the
classroom, however, can be messy and a time-consuming process. It can
take several days from start to finish to make seed paper. This craft
isn't for everyone. Keep reading to learn what you will need to make
seed paper and the directions. Then let us know in the comments if you
think you might give this craft a try!
Disclosure:
Affiliate links
to Amazon are included in this post.
To make seed paper, you will need:
- three pieces of tissue paper
- cookie sheet (nonstick is best)
- packets of flower seeds (one per child)
- a small bowl of warm water
- white glue
- paintbrushes
- scissors
- pencils
- optional: glitter

(first layer of tissue paper + seeds, wet)
Step One: Getting Everything Ready
- Take a small bowl of warm water and stir in some glue. Continue adding glue until the water turns cloudy.
- This watered-down glue will be the bonding agent used to add some durability to your seed paper and to keep the layers together.

(seed sandwich with three layers of tissue paper + two layers of seeds,
wet)
Step Two: Making the Seed Paper
- Lay your first sheet of tissue paper on the cookie sheet.
- Carefully paint the tissue paper with watered-down glue.
- Sprinkle some of the seeds onto the tissue paper.
- Cover the seeds with a second sheet of tissue paper.
- Coat the second layer with a thin coat of watered-down glue.
- Gently press the layers together.
- Repeat this process until you have a seed sandwich with three layers of tissue paper and two layers of seeds.

(dried seed paper, uncut)
Step Three: Cutting Hearts
- Set your seed sandwich aside to air dry. The paper will be stiff and 'crispy'. The edges may curl up as well. (If you set them near a heating vent, they will dry faster!)
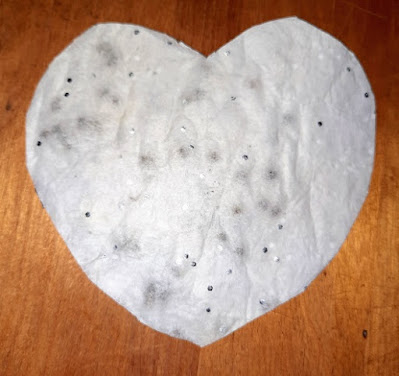
- Use a pencil to draw hearts on the dried paper. Be gentle so it doesn't rip.
- Use scissors to cut out the hearts. It's OK if you cut through some of the seeds.
- Don't throw away the scraps... if they have seeds in them, they can be planted too!
- If the edges of the hearts come apart while you're cutting, don't panic. Use your water-downed glue to seal them back up. Be careful... if you used a marker to draw the hearts, the ink WILL bleed when it gets wet!

Step Four: Planting the Seed Paper
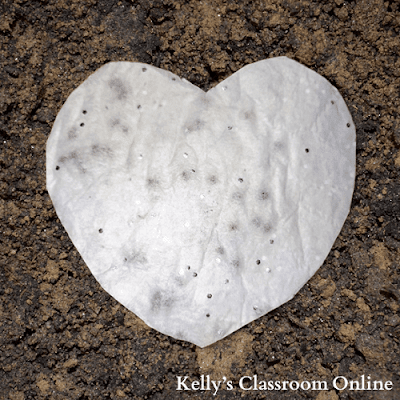
The seed paper hearts in this activity are plantable in soil.
Depending on the seeds you chose, you can either place the hearts on the
soil's surface or bury them. You can also water them in the same way
you'd water regular seeds. Read the back of the seed packet to
determine how you should plant your hearts and how much water they will
need.

You can also use strips of toilet paper to make these hearts. The
process is the same but requires more precision. Using toilet paper
will give you a softer texture when the hearts are done.
Important Message
Once you start working on the seed paper and those seeds get wet, the seeds WILL begin germinating. They will absorb the water and begin sending out small roots within days. It is important to plant the seed paper as soon as possible and keep those seeds moist. This seed paper is NOT shelf-stable. You can keep it as a decoration indefinitely, but if you want to actually grow the seeds, you need to do so ASAP. If you let the seed paper stay dry for too long, the seeds will die from neglect.
Did you enjoy learning how to make seed paper hearts? If so, check out
these other craft ideas:


